Table of Contents
ToggleAn outdoor kitchen transforms a backyard into an entertainment hub, but without proper ventilation, it becomes a smoky mess. A quality outdoor kitchen vent hood pulls smoke, steam, and cooking odors away from the dining area, keeping food flavor true and guests comfortable. Whether someone’s building a full outdoor cooking station or upgrading an existing setup, choosing and installing the right vent hood makes the difference between a pleasant evening and one cut short by smoke. This guide covers what works, why it matters, and how to get it done right.
Key Takeaways
- An outdoor kitchen vent hood captures and removes smoke, steam, grease, and odors by exhausting air directly outside through ductwork, making it essential for a usable outdoor cooking space.
- Choose a vent hood with 600–1,200 CFM for residential grills or 1,500+ CFM for high-output commercial grills, and match your hood’s outlet size to 6-inch or 8-inch rigid metal ducting for optimal airflow.
- Wall-mounted and island hoods are the most common outdoor kitchen vent hood types, with wall mounts being easier to install and island hoods offering multi-angle smoke capture from central cooking surfaces.
- Proper installation requires 24 inches minimum clearance above cooking surfaces, weather-resistant sealing, dedicated electrical circuits with GFCI outlets, and local permit verification before starting work.
- Stainless steel construction resists rust and weather better than aluminum or powder-coated alternatives, especially in humid or salty climates, making it the gold standard for outdoor vent hood durability.
- Monthly filter cleaning during heavy use and annual ductwork inspections keep your outdoor kitchen vent hood running efficiently, quietly, and protected against costly repairs.
What Is an Outdoor Kitchen Vent Hood?
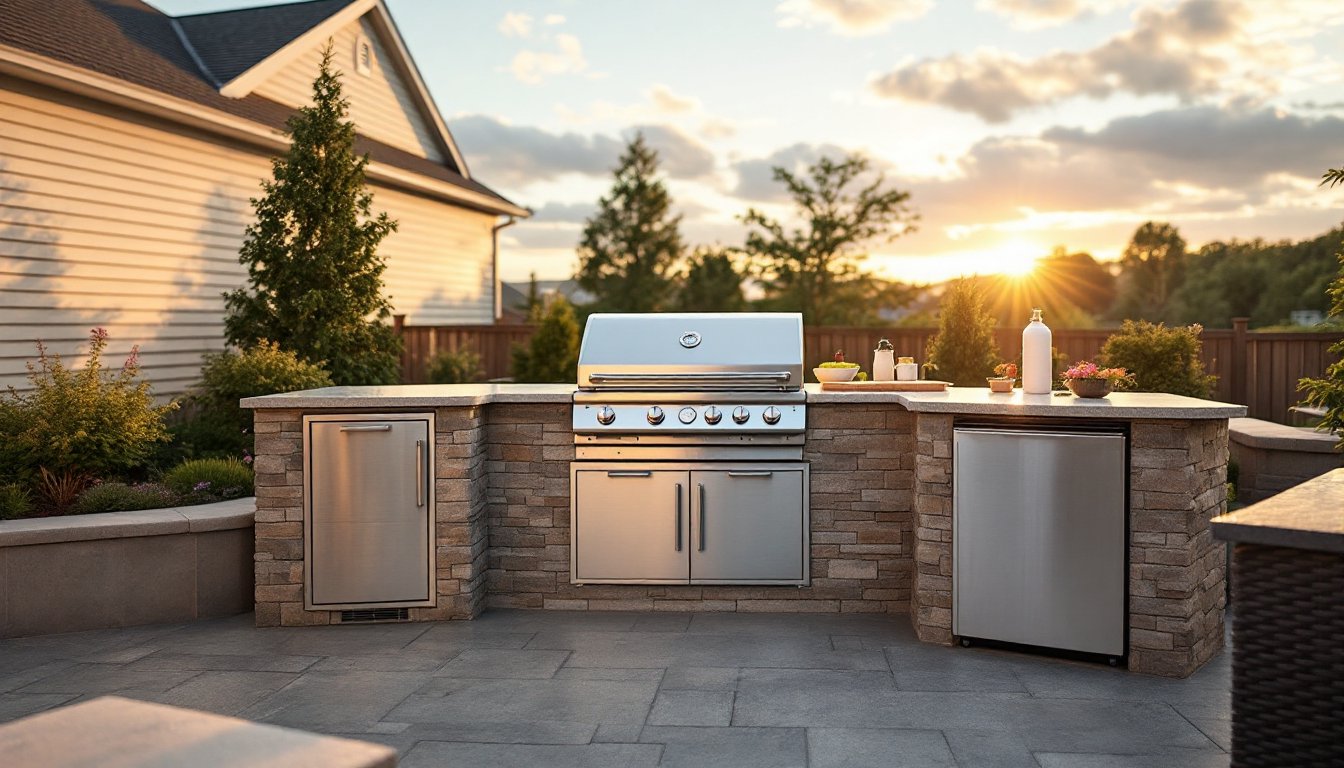
An outdoor kitchen vent hood is a ventilation system that captures and removes cooking byproducts, smoke, steam, grease, and odors, from the cooking area. Unlike indoor range hoods that recirculate air through filters, most outdoor hoods exhaust air directly outside through ductwork, which is far more efficient in open environments.
These hoods mount above grills, cooktops, or other cooking appliances and come in various sizes and styles to match different kitchen layouts. The hood contains a fan or blower that pulls air through a capture area, then pushes it through ducts to the outside. Some models include baffle filters or mesh filters that catch grease particles before air exits, reducing both mess and maintenance.
Outdoor vent hoods are built tougher than their indoor cousins. They’re rated for temperature swings, UV exposure, rain, and wind. Materials like stainless steel resist rust, while galvanized or powder-coated finishes handle weather better than painted options. The goal is simple: keep the cooking area breathable while protecting the investment.
Why Ventilation Matters for Outdoor Cooking
Proper ventilation solves real problems. Cooking at high heat, especially grilling, generates thick smoke and airborne grease. Without a hood, smoke drifts toward guests, food tastes ashy, and grease settles on nearby surfaces, decking, and furniture.
Ventilation also protects the structure. Smoke and grease can stain or damage siding, pergolas, and other overhead elements. A hood containing the airflow keeps these surfaces cleaner and extends their lifespan.
There’s a safety angle too. Certain fuels and cooking methods produce carbon monoxide. While outdoor spaces allow natural dispersal, a vent hood removes hazardous gases faster, especially important if the kitchen sits under a covered patio or pergola where gases might accumulate. Building codes in some jurisdictions require ventilation for enclosed or semi-enclosed outdoor cooking areas, it’s worth checking local IRC (International Residential Code) requirements.
Finally, a hood makes the space more usable. Guests stay longer, food stays hotter, and the cook isn’t squinting through smoke. It’s not just comfort: it’s function.
Types of Outdoor Vent Hoods
Under-Cabinet and Wall-Mount Hoods
Wall-mounted hoods attach directly to the exterior wall above the cooking surface. They’re the most common choice for outdoor kitchens because they’re straightforward to install and work well with built-in grills or cooktops. The ductwork runs horizontally or vertically through the wall, typically exiting through the siding.
These come in various widths (30, 36, 42, and 48 inches are standard) to match grill sizes. They’re accessible for cleaning and filter replacement without special equipment. Drawbacks: limited to one-direction airflow, and if the wall is a structural exterior wall, ducting through it requires careful planning and sealing to prevent weather infiltration.
Under-cabinet models fit in built-in configurations where the hood sits flush with cabinetry below. They’re sleeker than wall mounts and work well in tight spaces, but they still need outdoor-rated ducting and a weather-tight exit.
Island and Downdraft Hoods
Island hoods hang from overhead or mount on a decorative support structure, ideal when the cooking appliance sits in the middle of the kitchen. They capture smoke from multiple angles and look custom-designed. The trade-off: ductwork must run overhead or underground, which is more complex and costly.
Downdraft hoods pull air downward into an undercounter duct system, then exhaust it outside or to a side exit. They’re compact and work when overhead ducting isn’t practical. But, downdraft systems have less capture efficiency than overhead hoods and struggle with wide, high-output grills because heat and smoke rise naturally, fighting that loses performance. They’re best for smaller cooking surfaces or as a supplement to natural ventilation.
Key Features to Consider When Choosing a Vent Hood
CFM Rating (Cubic Feet per Minute): This is the hood’s airflow capacity. Outdoor kitchens need more CFM than indoor ranges because wind and open space disperse smoke faster. A general rule: use 600 to 1,200 CFM for most residential grills. High-output commercial grills or charcoal setups benefit from 1,500+ CFM. Check the appliance manufacturer’s recommendations, they often specify required CFM.
Ductwork Size: Most hoods use 6-inch or 8-inch ducking. Larger ducts (8-inch) move air more efficiently and allow for longer runs with fewer elbows. Measure the hood’s outlet size and match it: mismatched diameters reduce airflow. Use rigid metal ducting rather than flexible ducting in outdoor settings, flex ducts degrade in UV light and collect grease more easily.
Noise Level: Measured in sones or decibels, a quieter hood (under 3 sones) keeps conversations pleasant. Higher CFM usually means more noise: expect trade-offs. Some outdoor kitchens are far enough from gathering areas that noise matters less.
Filter Type: Baffle filters are self-cleaning, grease runs down them into a drip tray. Mesh filters trap smaller particles but require regular washing. Both are washable and reusable, which is cost-effective over time. Charcoal filters (for odor, not grease) only work in recirculating systems, which aren’t common outdoors.
Construction Material: Stainless steel is the gold standard, it resists rust and handles thermal cycling. Powder-coated or galvanized options are cheaper but less durable in salty or humid climates. Aluminum is lightweight but not as corrosion-resistant as steel.
Weather Sealing: Look for weather-resistant gaskets, sealed connections, and dampers that prevent backdrafts and rain entry when the hood is off. A backdraft damper in the ductwork stops wind from blowing into the kitchen.
Installation and Maintenance Tips
Before Installation: Measure the cooking surface width and height above it to the soffit or mounting point. Check for obstructions, roof peaks, siding, or electrical lines. Most local codes require at least 24 inches of clearance above the cooking surface: some demand more. Verify ductwork path: can it run through walls, attics, or along exterior surfaces? For wall exhaust, install flashing and a weather hood at the exit to prevent water intrusion.
If ductwork runs through the ceiling or walls, use proper ductboard sealant and duct tape (UL-rated, not cheap varieties). Seal all seams to minimize air leaks and grease escape. Hire an HVAC pro if the ductwork is complex or if the kitchen is under a covered area where codes might apply.
Electrical and Permits: Most hoods need 120V or 240V power. Run a dedicated circuit with a GFCI outlet within 6 feet of the hood, outdoor outlets must be protected. Some jurisdictions require electrical permits for new circuits. Check with your local building department: structural modifications, roofing penetrations, or gas line work typically need permits.
Installation Steps: Mount the hood securely using stainless steel or galvanized fasteners. Attach ductwork with hose clamps or duct screws, overlapping each joint by 2 inches. Slope ducts slightly downward (1/8 inch per foot) if they run horizontally to help grease drain back to the hood. Install the drip tray underneath the hood for easy greaseremoval.
Maintenance: Clean filters monthly during heavy use, more often for charcoal or high-grease cooking. Wipe down the hood exterior quarterly. Inspect ductwork for dents or separations annually. Clear the exit damper of any bird nests or debris. In winter, ensure the damper moves freely and isn’t frozen. A clean hood runs quieter, more efficiently, and lasts longer.
Regular upkeep prevents costly repairs and keeps the outdoor kitchen functional year-round.
<h2 id="” data-id=””>The Bottom Line: Make Smoke Go Away
An outdoor kitchen vent hood isn’t a luxury, it’s the difference between a space that’s usable and one that’s barely usable. Choose the right type and size for the cooking surface, pick durable materials rated for weather, and install it properly with sealed ductwork and flashing. Routine maintenance, filter cleaning and seasonal checks, keeps it running hard for years. A well-ventilated outdoor kitchen lets the cook focus on food and guests focus on company, not smoke. That’s the goal.