Table of Contents
ToggleAn outdoor kitchen without shelter isn’t really an outdoor kitchen, it’s a collection of appliances exposed to rain, sun, and debris. A well-designed outdoor kitchen roof transforms a seasonal luxury into a year-round gathering space, protecting expensive equipment and making cooking comfortable in nearly any weather. Whether someone is grilling in a downpour or cooking under the intense summer sun, the right roof system keeps food prep functional while extending the life of cabinets, countertops, and built-in appliances. This guide covers everything from choosing materials to understanding installation requirements, so readers can build or upgrade an outdoor kitchen roof that actually lasts.
Key Takeaways
- An outdoor kitchen roof protects expensive appliances and cabinetry from UV damage, water intrusion, and weather while extending the usable season and keeping the cooking zone 10–15°F cooler on hot days.
- Polycarbonate panels cost $8–$15 per square foot and allow light through but yellow after 10–15 years, while metal roofing costs $12–$20 per square foot and lasts 30+ years with minimal maintenance.
- Proper outdoor kitchen roof installation requires a minimum slope of 1/4 inch per 12 inches of run, flexible fastening to accommodate material expansion, and adequate drainage through gutters and downspouts to prevent water pooling.
- Wood and composite roofing materials offer aesthetic appeal but demand sealing or staining every 2–3 years, while metal roofing is virtually maintenance-free and provides superior durability in long-term installations.
- Building permits and professional design are typically required for outdoor kitchen roof projects over 200 square feet or attached to structures, with joists sized according to local snow and wind codes.
- Regular maintenance—including monthly debris clearing, fastener inspection, and avoiding pressure washers on polycarbonate—extends roof life across all materials and prevents costly damage.
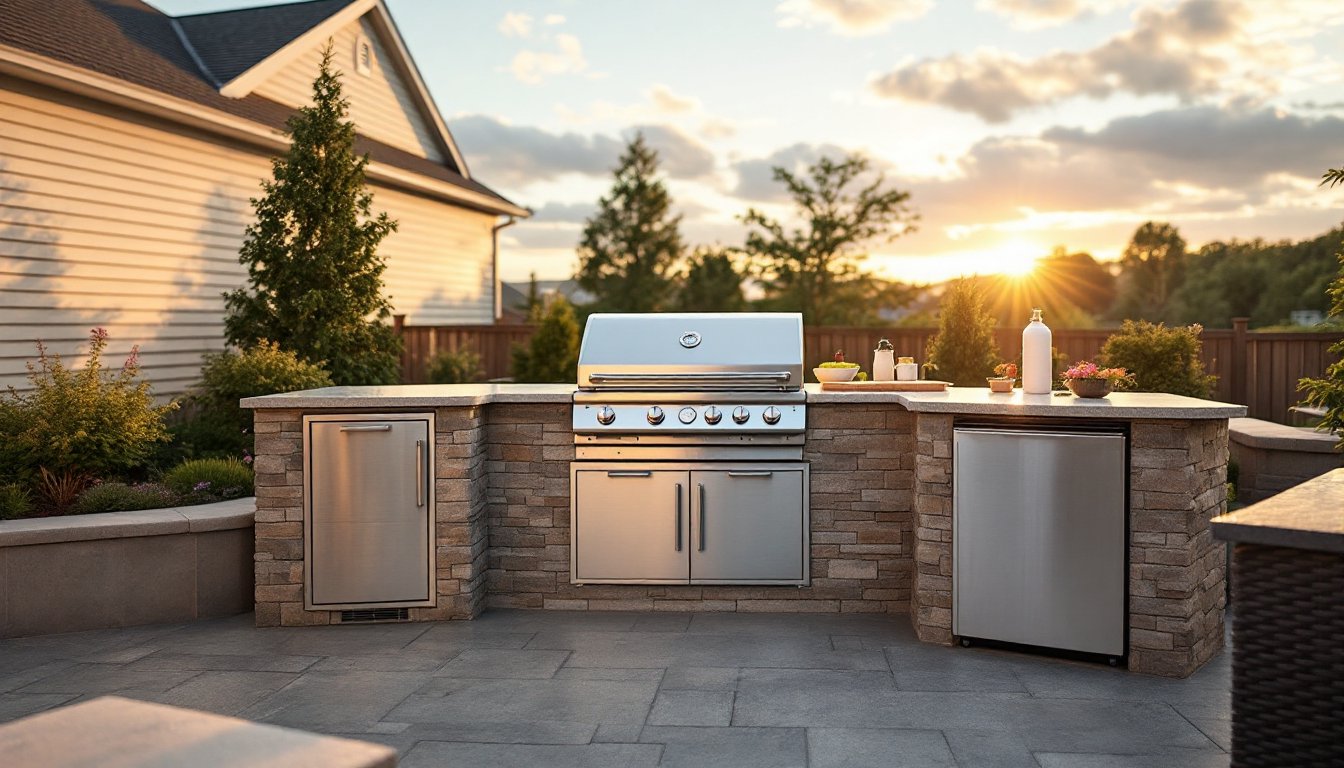
Why Your Outdoor Kitchen Needs A Roof
Outdoor kitchens sit at the mercy of the elements. Without overhead protection, built-in grills, mini fridges, and countertops face constant exposure to UV rays, which fade finishes and degrade materials. Water intrusion warps cabinets, rusts metal components, and creates mold in seams and joints. Even a brief rainstorm can leave puddles on countertops, damage electrical connections, or force someone to abandon meal prep mid-way through.
A roof isn’t purely functional, it extends the usable season. Shade keeps the cooking zone 10–15°F cooler on hot days, making work more comfortable. It protects against falling leaves, pollen, and debris that would otherwise land in food or clog drain systems. For anyone who’s invested in quality outdoor appliances and cabinetry, a roof is not a luxury add-on: it’s essential protection that preserves the initial investment and makes the space genuinely livable.
Popular Outdoor Kitchen Roof Materials and Their Benefits
Choosing the right roofing material depends on local climate, budget, and aesthetic goals. Each option has trade-offs in durability, maintenance, and cost.
Polycarbonate and Metal Panels
Polycarbonate sheets (clear or tinted) allow light through while blocking UV rays and weather. They’re lightweight, relatively affordable ($8–$15 per square foot installed), and require minimal structural support. Homeowners appreciate the ability to see the sky while staying dry. But, polycarbonate yellows and becomes brittle over 10–15 years and needs to be replaced: it also expands and contracts with temperature, requiring flexible fastening to prevent cracking.
Aluminum or steel panels offer better durability and are virtually maintenance-free. Corrugated metal roofing costs $12–$20 per square foot installed and can last 30+ years with proper fastening. Metal reflects heat well and won’t yellow or degrade like polycarbonate. The main drawback is noise during rain, bare metal amplifies rainfall sounds unless insulation or a sound barrier is added underneath. Powder-coated finishes come in multiple colors to match design preferences.
Wood and Composite Options
Wooden slat roofs or pergola-style coverings provide an upscale look and are popular in temperate climates. Pressure-treated pine or cedar, or composite lumber (like [Trex](https://www.trex.com) or [Timbertech](https://www.timbertechwood.com)), resists rot and insects. Expect $15–$30 per square foot. Wood needs regular sealing or staining every 2–3 years to prevent weathering and mold growth. A slatted roof still allows some water through, so guttering and slope are critical.
Composite materials (plastic-wood blends) don’t require staining but cost more upfront. They’re heavier than polycarbonate, requiring more robust framing. Both wood and composite are best suited where aesthetics matter as much as function.
Key Design Considerations for Your Roof Installation
A roof is only as good as its structure and drainage. Several factors determine whether an installation is DIY-friendly or requires permits and professional help.
Pitch and slope matter. A flat roof will pool water and eventually leak: aim for a minimum slope of 1/4 inch per 12 inches of run (roughly 2%). A steeper pitch (4/12 or higher) sheds water faster and reduces mold growth in humid climates. Slope also affects structural load, a steeper roof spreads wind and snow loads differently.
Framing support must handle weight and weather loads. In most jurisdictions, roofs over 200 square feet or attached to structures require building permits and design by a licensed professional. If the roof will support weight (such as solar panels or extra insulation), the joists, typically 2×8 or 2×10 lumber spaced 16 inches on center, must be sized to local snow and wind codes. Using actual dimensions is important here: a nominal 2×8 measures 1.5″ × 7.25″ actual. [Check local IRC (International Residential Code) requirements](https://www.iccsafe.org) for your region.
Drainage systems prevent water from pooling or running onto adjacent areas. Gutters and downspouts direct water away from the kitchen and foundation. Without gutters, water can cascade down the sides and create mud or ice hazards.
Fastening and gaps must account for material expansion. Polycarbonate especially expands 1/4 inch or more per 10-foot span in heat: rigid fasteners will cause it to crack. Use slotted holes and flexible fasteners (rubber washers, metal-backed screws) rather than tightening bolts solid.
Ventilation below the roof prevents moisture buildup under the covering, which invites mold and rot in the framing. If using closed panels, consider soffit vents or strategic gaps to allow air circulation.
Maintenance and Longevity of Outdoor Kitchen Roofs
Different materials demand different upkeep schedules. Polycarbonate needs yearly clearing of debris and inspection for cracks or discoloration: most will need replacement after 12–15 years. Metal roofing is nearly hands-off but should be inspected after severe storms to check fastener integrity: reflective coatings can be reapplied every 5–10 years if desired. Wood and composite require more active maintenance: sealing every 2–3 years prevents rot and mold, especially in wet climates.
Regular cleaning extends life across all materials. Remove leaves, pine needles, and standing water monthly, particularly in fall and spring. Use a soft brush and avoid pressure washers on polycarbonate (high pressure can force water into joints). For metal roofs, inspect fasteners and replace any that are corroded or loose, loose fasteners allow water penetration and wind damage.
Snow and ice buildup is a concern in cold climates. Some materials (especially metal with a low-slope roof) shed snow more reliably than others. In heavy snow zones, consider adding snow guards or a slight raised edge to prevent sliding sheets of ice from damaging the roof structure or posing a safety hazard below.
Conclusion
An outdoor kitchen roof isn’t a cosmetic upgrade, it’s an investment in function and longevity. The right choice depends on climate, budget, and how much maintenance someone is willing to do. Polycarbonate suits smaller, budget-conscious projects in mild climates: metal offers durability and low maintenance for long-term installations: wood delivers aesthetics but requires ongoing care. Whatever material chosen, proper slope, framing, fastening, and drainage are non-negotiable. Start with a clear understanding of local building codes, and don’t skip the prep work. A well-built roof will keep an outdoor kitchen comfortable and protected for decades.