Table of Contents
ToggleA built-in grill transforms a backyard from a flat expanse into a functional outdoor kitchen hub. Unlike a portable grill, a permanent installation commands attention and adds real value to a home, both in daily enjoyment and resale appeal. The investment upfront is real, but so are the rewards: entertainment becomes easier, cooking outdoors feels less like a hassle and more like the main event, and that backyard suddenly feels like an extension of the house. This guide walks through what makes a built-in grill worth the time and money, which features matter most, how to plan the installation, and how to keep it running strong for years.
Key Takeaways
- A built-in outdoor kitchen grill adds lasting value to your home through improved entertainment capability, resale appeal, and superior heat retention compared to portable alternatives.
- Choose a 36-inch grill as a practical middle ground for most residential needs, and prioritize grill-level thermometers and stainless steel grates for better performance and durability.
- Natural gas offers convenience with fixed installation, while propane provides flexibility to place your outdoor kitchen grill anywhere in your yard with tank swaps.
- Proper installation requires a solid level foundation, at least 36 inches of clearance from combustibles, licensed utility rough-in work, and heat-resistant surrounding materials like stone or stainless steel.
- Clean grates after every cook, protect the exterior with a cover, and perform annual burner and ignition checks to ensure your built-in grill operates reliably for 10+ years.
Why a Built-In Grill Is Worth the Investment
Portability is convenient until it isn’t. A built-in grill anchors your outdoor cooking space, eliminating the wheeling-back-and-forth shuffle and freeing up storage in the garage. Once installed, a permanent setup encourages outdoor entertaining because the barrier to firing it up drops to nearly zero, no storing, retrieving, or fussing with connections.
They also command better heat retention and performance than most cart-style grills. Heavy-duty construction, insulated firebox designs, and burners engineered for fixed installations mean more even cooking and faster heat recovery. You’re not fighting a wobbling cart: you’re working with a tool built to stay put.
Resale value matters too. Homebuyers shopping in mid-to-upper price ranges notice outdoor kitchens. A finished built-in setup with plumbing and electric rough-in signals that the property has been properly maintained and upgraded. It’s not a guarantee, but a well-executed outdoor kitchen is among the few outdoor projects that returns meaningful value at sale.
Essential Features to Look For in a Built-In Grill
Cooking Surface Size and Material
Grill size is about both the food and the cooking style. Most residential built-ins range from 30 inches to 48 inches wide. A 36-inch grill is a common middle ground, large enough for a weeknight family meal or a small gathering, not so massive that you’re grilling for a catering business every weekend.
Cooking grates matter more than many DIYers realize. Stainless steel holds heat better and resists rust longer than cast iron, but cast iron holds seasoning and creates better char marks. Some high-end models use hybrid designs with stainless rods over cast supports. For durability in wet climates, stainless is the safer choice: in drier regions, either works if you clean regularly.
Thermometer placement is worth checking. A grill-level thermometer (one mounted near the cooking surface) gives a far more accurate read than a dome-mounted gauge, especially if you’re monitoring thinner cuts. Some built-ins come with wireless meat thermometers as an upgrade, helpful if you’re working with large capacity and don’t want to lift the lid constantly.
Fuel Type Options
Natural gas is the easiest built-in choice if your property has gas service. A single supply line runs to the grill, and you control flame height easily. The downside: you’re tethered to that gas line, so the grill’s location depends on infrastructure.
Propane offers flexibility. A tank sits nearby (in a weatherproof cabinet or under a side shelf), and you swap it out when empty. No digging for lines, and the grill can sit anywhere in your yard. Propane costs vary regionally and seasonally, and you need to manage tank swaps.
Charcoal and wood-burning grills, like Kamado-style inserts or offset firebox designs, demand more attention and skill but deliver flavor many gas grills can’t match. They’re slower to heat, harder to dial in precisely, and require more frequent cleaning. They’re for people who view the ritual as part of the appeal, not a chore.
Installation and Space Planning Considerations
A built-in grill isn’t just dropping hardware in place. It needs a foundation, clearance, and often rough-in work for utilities.
Foundation and support: The grill sits on a structural base, usually a concrete pad, a block structure, or a reinforced deck frame. The pad must be level and solid: an uneven base causes heat distribution problems and makes burner ignition temperamental. If building on a deck, consult the deck’s load rating and consider whether local code requires a permit. Most jurisdictions require inspection for permanent outdoor structures, especially anything involving gas or electric.
Clearance and ventilation: Leave at least 36 inches of clearance above the cooking surface and 36 inches horizontally from any combustible structures (siding, soffit, overhanging roof). This isn’t arbitrary, it’s based on IRC (International Residential Code) standards that vary slightly by region. Check your local building department before finalizing layout. Roofed pergolas or overhangs above the grill are risky unless they’re mesh or fully vented and the distance is generous.
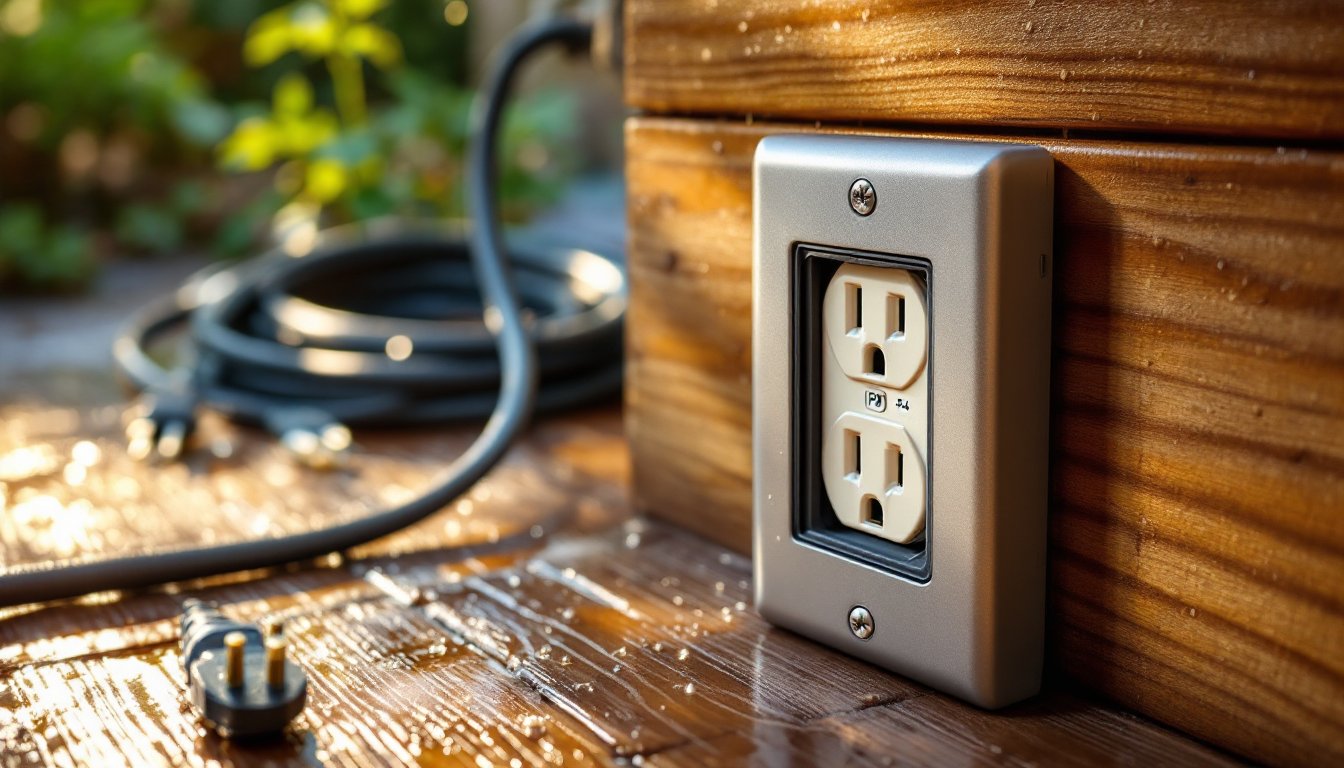
Utility rough-in: If plumbing a sink or water line nearby, or running electrical for lights or powered rotisserie attachments, that work often happens before the grill ships. Getting those specs from the grill manufacturer beforehand saves expensive rework. Natural gas lines should be installed by a licensed plumber or gas fitter: this isn’t a DIY job. Propane lines can be simpler, but pressure-testing and safety regulations still apply, don’t wing it.
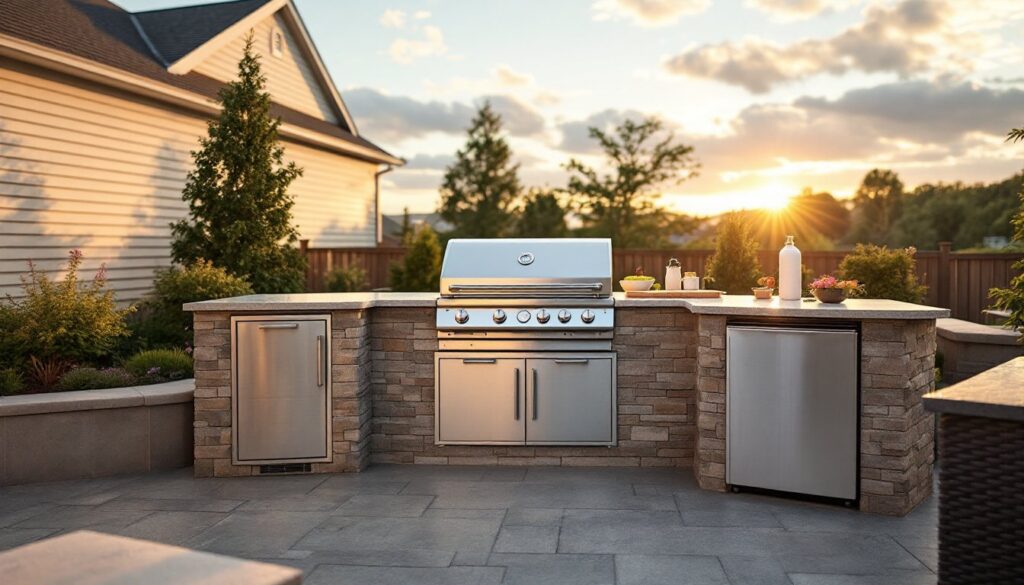
Countertop and surround: Surrounding materials must handle heat. Stainless steel side tables are standard and sensible. Stone or concrete countertops work: wood does not without significant insulation barriers. Some DIYers build concrete countertops in place or have them poured on-site. Allow the concrete to fully cure (28 days minimum) before subjecting it to heat from the grill.
Maintaining Your Built-In Grill for Longevity
Longevity depends on consistent care, not heroic effort.
Clean after every cook. Once the grates cool slightly, use a stainless steel grill brush to scrape away debris. This prevents carbon buildup from baking on and corroding the grates. A quick wipe also helps you spot wear early.
Protect the exterior. A custom cover or waterproof tarp shields the housing from rain and UV. In coastal areas, salt spray corrodes even stainless steel over time, covers are worth the investment. Bring propane tanks inside or store them upright in a protected spot during off-season.
Check burners and ignition annually. Listen for uneven ignition clicks, or fire up the grill and look for uneven flame patterns. A blocked port on a burner flares up or cooks cold spots. Manufacturer manuals usually show how to remove and rinse burners without tools: it’s a 10-minute job.
Inspect thermometer wires and electronic components before each season. Moisture can corrode connections: reseating wires often restores function. If the grill has a rotisserie or motorized spit, oil the rod and bearing per the manual, these fail fastest when neglected.
Professional service isn’t always necessary, but if the grill sits for winter or shows age, a pre-season tune-up from an authorized dealer catches small problems before they become costly repairs. They’ll re-pressurize gas lines, test ignition, and replace worn seals.
Conclusion
A built-in outdoor grill isn’t impulse entertainment. It’s a considered investment that lives in your backyard for a decade or more. The right model, installed properly with solid prep work and regular maintenance, becomes a centerpiece that makes outdoor entertaining feel natural instead of like a special event. Start with honest answers about how much you’ll actually cook, what fuel makes sense for your property, and whether local codes require permits or licensed installers. Then commit to the upfront work, solid foundation, proper clearance, correct utility rough-in, and you’ll build something your household genuinely uses, year after year.