Table of Contents
ToggleA dedicated backyard fishing station changes the entire rhythm of your time on the water. Instead of spending the first twenty minutes of a morning trip digging through plastic bins, untangling lines, or hunting down a fillet knife, you back out of the driveway knowing every piece of gear has a place — and is actually in it. That kind of readiness is not an accident. It is the product of a thoughtful build.
This is a project for anglers who fish enough to justify doing it right. If you are out on the water most weekends from spring through fall, if you have multiple rods rigged for different techniques, and if your garage floor currently looks like a tackle shop after an earthquake — this guide is built for you. We are going to walk through every component of a serious backyard fishing and boating station: the rod storage wall, the tackle organization cabinet, the fish cleaning station, and the boat gear staging area. When it all comes together, you will have a purpose-built outdoor workspace that handles everything from pre-dawn rigging sessions to post-trip gear breakdown without a single wasted step.
Why a Dedicated Station Pays for Itself
The upfront investment is real — lumber, hardware, a sink, weather-resistant finishes, and a few weekends of work. But the returns start showing up immediately. Fishing gear that lives in a disorganized pile deteriorates faster than gear that is properly stored. Rods get stepped on, reels collect moisture in the wrong places, and tackle that is not sorted gets lost, duplicated at the next store visit, or simply left behind on a trip. A purpose-built station protects everything you have already spent money on.
There is also the practical matter of time. Most fishing trips start late or end with a chaotic unload because there is no system on either end. When the station is built right, a solo morning outing takes fifteen minutes to prep instead of forty-five. Gear goes back to its designated spot the moment you come home, and it is staged and ready the next time you head out. That is the real payoff — not just organization for its own sake, but the consistent habit of readiness that a well-designed outdoor space creates.
The Hidden Cost of a Messy Gear System
Tangled lines waste leader material. Hooks left loose in a bucket rust and need replacing. Reels stored in damp containers develop corrosion on the drag mechanisms. A rod leaning against the garage wall gets knocked down enough times that eventually a guide cracks or a tip snaps. None of these losses are dramatic on their own — they are just a slow, steady drain on your gear budget. A proper storage system eliminates most of it. This is not about being tidy for the sake of tidiness. It is about protecting what you have already invested in and being ready when conditions are right.
Planning the Layout Before You Pick Up a Saw
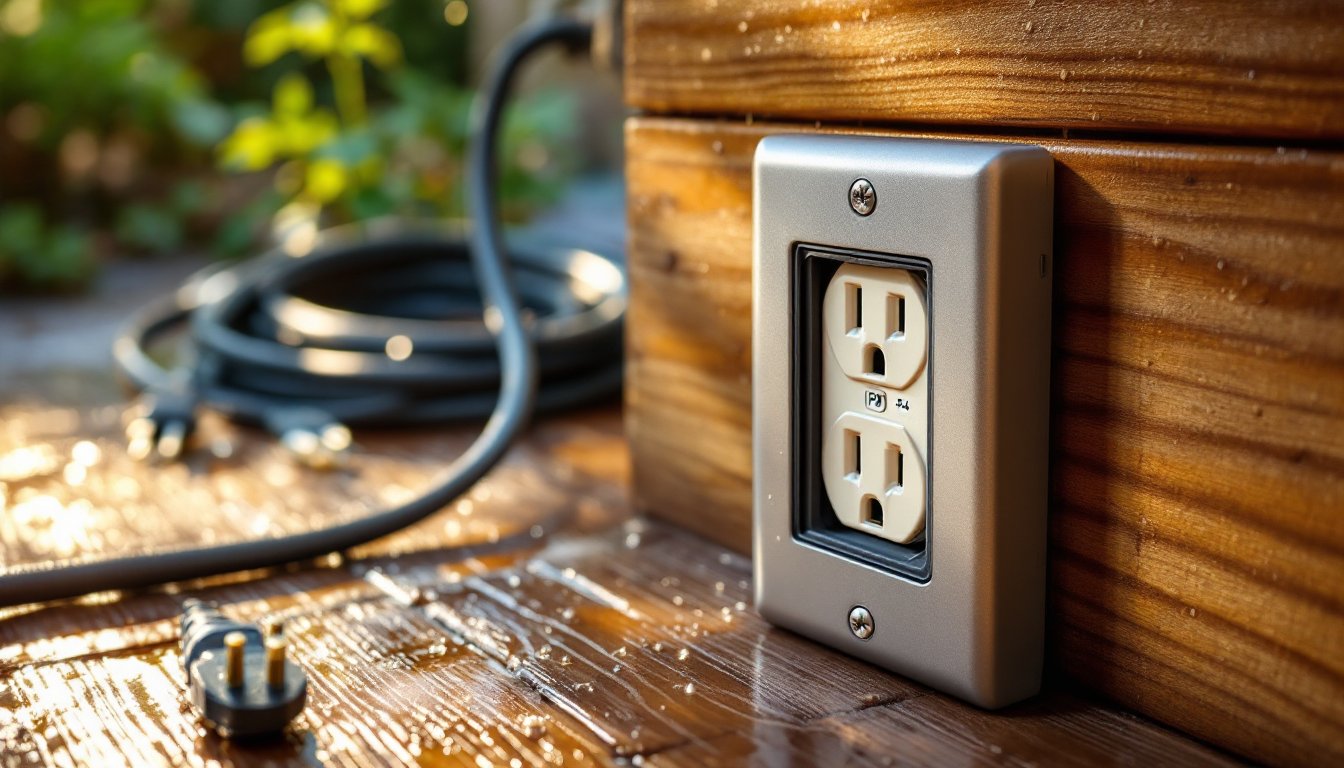
Before touching a single board, walk the area where the station will live and ask the right questions. How much wall space is available? Is there a covered structure — a carport, a shed wall, a garage exterior — that can serve as the backbone of the build? How close is a water source? Is there an outdoor outlet nearby if you want lighting, a small chest freezer for the catch, or a powered fillet knife? The answers to these questions will shape every decision that follows.
Think about the station in zones rather than individual pieces. Zone one is rod and reel storage — clean, protected, and easy to access. Zone two is the tackle organization area, ideally a cabinet or a wall panel where boxes and trays live in a predictable order. Zone three is the fish cleaning station, positioned near a water source and away from any seating area. Zone four is the boat gear staging area, where life vests, anchors, dock lines, and electronics cases are stored and inspected between trips. These four zones can share a ten-foot run of wall space or spread across a larger dedicated area, depending on what you are working with.
Choosing Materials That Survive the Outdoors
This is where a lot of DIY fishing station builds fall short. Standard pine or untreated lumber looks fine through the first season and starts deteriorating quickly after that. For anything exposed to weather, pressure-treated lumber is the right foundation. Pair it with stainless steel hardware — screws, hinges, hooks, and brackets — because anything zinc-coated will rust and stain within a year in a wet environment. For shelving surfaces and cutting areas, exterior-grade plywood with a solid spar urethane finish holds up well, or use HDPE (high-density polyethylene) cutting board material, which is what commercial fishing operations rely on for good reason: it does not absorb odors, it cleans with a rinse from a hose, and it never needs refinishing.
Building the Rod Storage Wall
Rod storage is the centerpiece of a well-organized fishing station, and it is also one of the most satisfying builds in the whole project. The goal is to hold rods horizontally and safely, protect the guides from contact damage, and keep everything visible so you are not pulling rods out one at a time to check what is rigged.
Designing and Building a Custom Rod Rack
A simple two-board horizontal rack works exceptionally well and can be built in an afternoon. The basic materials list is short and inexpensive.
- Two lengths of 1×6 pressure-treated board for the top rail (notched to cradle rod tips)
- Two lengths of 1×4 pressure-treated board for the lower rail (to support rod handles)
- Foam pipe insulation cut into short sections to line each notch and protect rod blanks
- 2×4 ledger boards for wall mounting, with exterior-rated lag screws into studs or masonry anchors
Space the notches on the top board approximately four inches apart — enough clearance to pull one rod without disturbing the others. Cut each notch at about 1.5 inches wide and two inches deep for standard rod blanks, and press a short section of foam pipe insulation into each channel so the blank never contacts raw wood. The lower rail simply needs a shallow V-groove or padded cradle at matching intervals to seat the rod handle.
Set the rack height so the tips of your longest rods clear the ground with room to spare and the handles sit at roughly waist height. A double-tier system — one rack above the other — doubles your capacity without using any additional wall space. Reserve the lower tier for your active setups and the upper tier for rods you rotate in less frequently.
Adding Reel Storage and a Drying Spot
Not every reel needs to stay mounted on a rod between trips. A wall-mounted pegboard panel beside the rod rack gives you a flexible area to hang spare reels, landing nets, pliers, and fillet knives. Use stainless steel S-hooks and locking peg hooks rather than cheap plastic hooks that bend and drop expensive gear. Directly below the rod rack, add a weatherproof drip mat or a shallow tray where rods and reels can air dry after a trip before going back to their spots. It is a small addition that does real work for the long-term condition of every reel on that wall.
Tackle Organization That Scales With Your Fishing
Tackle management is personal — bass anglers carry completely different systems than walleye fishermen or surf casters. But the underlying principle is the same across every discipline: you should be able to locate any piece of tackle in under thirty seconds without opening more than one container. When that benchmark is met, your prep time drops and your focus on the water goes up.
Building a Tackle Cabinet That Works for Your System
A lockable, weatherproof cabinet is the best anchor for a tackle organization system. You can build one from exterior-grade plywood with a piano hinge and a hasp lock, or repurpose a metal utility cabinet with some interior shelf modifications. The key is configuring the interior to hold your specific tackle boxes and trays without letting them slide around or stack in a way that makes the bottom tray inaccessible. Install fixed horizontal shelves at intervals that match the height of your storage boxes, and add shallow dividers along the back wall for soft bags, leader spools, and zip-top bait bags.
Organize the cabinet by technique rather than by species or lure type. A shelf labeled “topwater,” a shelf labeled “bottom rigs,” and a shelf labeled “live bait terminal” will serve your brain faster than any other system when you are trying to load out quickly in the dark. A label maker costs almost nothing and pays for itself the first morning it saves you from standing in front of an open cabinet trying to remember where the drop shot weights ended up.
Constructing a Proper Fish Cleaning Station
A dedicated fish cleaning station is where the backyard setup makes its biggest quality-of-life jump. Cleaning fish on a picnic table or a tailgate is functional until you have done it two hundred times. A purpose-built station at the right working height, with water access and a proper waste channel, turns cleaning into a ten-minute task instead of a drawn-out chore that leaves a mess and a smell behind.
Frame, Surface, and Sink
Build the frame from 2×4 pressure-treated lumber and set the table height at 36 to 38 inches. This puts the work surface at a comfortable standing position that does not have you bent over for twenty minutes at a stretch. The table should be at least 24 inches deep and 48 inches wide to accommodate a full-sized fish and all the tools around it. A drop-in utility sink — the kind sold for garage installation — fits cleanly into a cutout in the frame and gives you a rinse basin and a drain. Route the drain to a bucket or a dry well placed well away from the seating area of the yard.
Flank the sink with HDPE cutting board material on both sides, screwed down from underneath so the surface stays flat and clean. Mount a fish tail clamp on one end — a galvanized bar clamp fixed to the table edge works well and costs very little. Add a magnetic knife strip on the nearest vertical post so your fillet knife, boning knife, and shears are always at arm’s reach. A spring-loaded coil hose reel mounted below the table edge keeps the spray nozzle accessible without leaving the hose piled on the ground.
Handling Waste the Right Way
Plan for waste before you ever clean the first fish at the station. A heavy-duty trash receptacle with a lockable, animal-resistant lid should sit directly beside the cleaning table. Some anglers add a sloped rear lip to the table surface that channels fluid waste into a removable collection pan underneath — it can be emptied and rinsed without waste ever hitting the ground. Keeping the cleanup simple means it actually gets done after every use, and that means no persistent odors, no pest problems, and no reason to clean fish anywhere else.
Building Out the Boat Gear Staging Area
Fishing and boating overlap so completely that separating the two storage systems does not make practical sense. The boat gear staging area should sit adjacent to the rest of the station and serve as both a storage and inspection zone — a place where everything that belongs on the boat is checked, organized, and ready to load in a single pass.
Assigning Every Piece of Boat Gear a Permanent Home
Life jackets should hang on individual hooks so they air out completely between uses. Stacking them in a bin holds moisture against the foam and accelerates deterioration of both the material and the buckles. Dock lines coil and hang on cleats mounted to the wall. Anchors sit on a low shelf where they are easy to grab without tipping or knocking over other gear. Marine electronics cases — fish finders, GPS units, handheld radios — go on a dedicated enclosed shelf protected from moisture and direct sun exposure. Boat bumpers, fuel cans, and bilge pumps each need assigned spots so that when you are loading out at 4:30 in the morning, nothing gets left sitting on the driveway.
Using the Station as a Gear Audit
A well-organized boating station naturally leads you to audit your gear — and savvy anglers know that upgrading to the right boat propellers for their engine and water conditions is one of the first performance improvements worth making. When everything is laid out and accounted for, it becomes far easier to identify what is worn, what is undersized for how you are actually using the boat, and what has simply been aboard so long you have stopped noticing it. The staging zone creates that clarity. Use it.
Weather-Proofing and Keeping the Station in Shape
A backyard fishing station is exposed to everything — direct sun, rain, morning dew, salt air near the coast, and winter freeze-thaw cycles in colder climates. Building it right from the start matters, but so does a simple maintenance routine that keeps the whole setup functional for years rather than seasons.
Protecting the Wood and Hardware
All exposed wood surfaces — the rod rack rails, the cabinet frame, the cleaning table legs — should receive a fresh coat of exterior spar urethane or penetrating oil-based wood sealer at the start of every season. Stainless steel hardware is largely self-sufficient, but wipe down screws and hooks near the cleaning station periodically because fish slime and blood accelerate corrosion even on quality fasteners. The HDPE cutting surfaces can be scrubbed with a diluted bleach solution and rinsed completely — no sealing, no sanding, no annual maintenance required.
Adding a Roof or Cover
If the budget allows, adding a corrugated metal roof panel or a simple pergola-style shade structure over the station delivers one of the best returns in the entire project. It keeps direct UV off your fishing line — sun degradation on monofilament and fluorocarbon is real, and it shortens usable line life significantly. A roof also keeps rain off the tackle cabinet, reduces moisture on the rod rack, and makes the station usable during a light drizzle, which is often exactly when you want to be rigging up. A ten-foot run of corrugated metal roof panels on a simple 4×4 post frame is a one-day build and changes how the entire station functions across all four seasons.
Putting the Build Together
The best version of this project gets done in stages rather than all at once. Start with the rod storage wall — it is the fastest build, it delivers immediate returns, and it gives you a feel for working in the space before committing to the larger pieces. Add the tackle cabinet next, then the fish cleaning station once the water source situation is confirmed. The boat gear staging area can be built out gradually over the course of a season as you add shelves and dedicated hardware one piece at a time.
What you end up with is a backyard workspace that reflects how seriously you take your time on the water. Every rod has a spot. Every tackle box has a shelf. The cleaning station is ready the moment you come home with fish. The boat gear is staged and checked before you even hitch up the trailer. That is not over-engineering a hobby. That is what it looks like when you decide to stop losing hours to disorder and start spending them fishing.